Project: Rolodex
Rolodex is a desktop contact management application for users who prefer working without a mouse to manage their contacts more efficiently. If you are a businessman with a list of clients to remember, a teacher who wants to organize their student information, or anyone with a need for contact management, Rolodex provides you with a way to organize your important contacts in a fast and productive manner.
The user interacts with the application using a CLI (Command Line Interface), and it has a GUI created with JavaFX.
It is written in Java, and has about 10 kLoC.
Code contributed: [Functional code] [Test code] [Unused code]
Enhancement Added: Drop-down List
External behavior
With the help of the drop-down list of suggestions, you do not need to memorise any command.
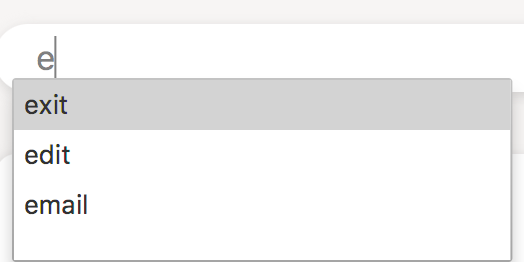
When you type your commands inside the command box, you will notice that a drop-down list appears.
For example, if you type the letter "e", a drop-down list consisting of three options edit, email and exit appears, as shown in the screenshot below.
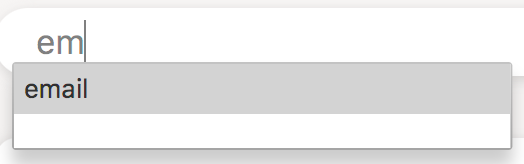
The list will get updated as you type, to only display commands that match your input. Following the previous example,
if you type the letter "m" after having typed in "e", the list should only consist of the email command now.
When the drop-down list is shown, you can:
-
Use
↑and↓arrow keys to navigate through the list -
Press Enter to select the highlighted option
or
-
Use your mouse to click on the option to select it
After you have selected the command you wish to enter, you should see it displayed in the command box.
For example, you should see the following when you select email in the drop-down list.

Now you can:
-
press Enter to execute the command if no additional fields are required, or
-
continue to type in the rest of the command input, or
-
press Tab to activate auto-completion, see 3.2. Auto-completion for details.
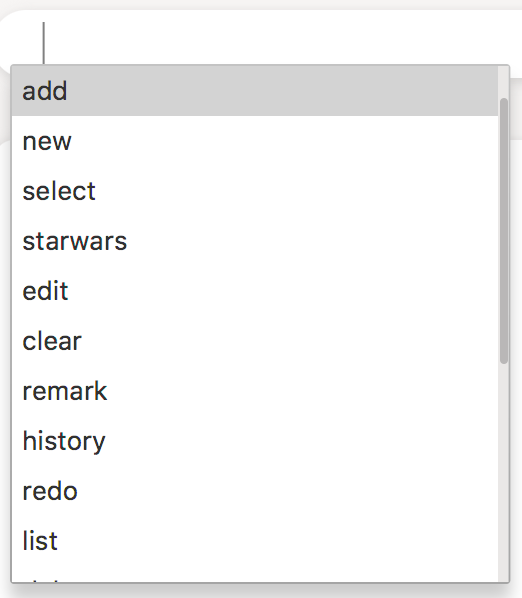
If you want to see the list of all commands, simply type Space in an empty command box. The following list should appear.
Justification
It will be difficult for the user to memorise all the commands. The drop-down list suggests possible commands as he/she types, making keying in commands much easier.
Users can also make use of the drop-down list to type commands faster. They can directly select the correct suggestion without having to manually type out the command word in full.
Implementation
The dynamic drop-down list is created using org.controlsfx.control.textfield.TextFields API (Application Programming Interface).
The bindAutoCompletion method in the TestFields creates a new auto-completion binding between the given textField and the given suggestion provider.
The code below shows the exact implementation.
TextFields.bindAutoCompletion(commandTextField, sr -> {
    Set<String> suggestedCommands = new HashSet<>();
    for (String command: LIST_OF_ALL_COMMANDS) {
        if (!sr.getUserText().isEmpty() && !command.equals(sr.getUserText())
            && command.startsWith(sr.getUserText().trim().toLowerCase())) {

            suggestedCommands.add(command);
        }
    }
    return suggestedCommands;
});
Possible commands are checked against the user input and added to the Set suggestedCommands accordingly, which will be displayed as the drop-down list.
A command is added if all three conditions are satisfied:
-
The user input is not empty.
-
This is to prevent the drop-down list from appearing every time the command box is cleared after the execution of a command.
-
-
The user input is not a valid command.
-
There is no need to display the drop-down list of suggestions when the user has typed in a correct command.
-
-
The command starts with the user input.
-
This is to suggest the possible commands that the user is trying to type.
-
Design Considerations
Implementation
Alternative 1 (current choice): Make use of TestFields API
Pros: Easy to implement
Pros: List is dynamic.
Cons: User cannot see the full format of the commands in the drop-down list.
Alternative 2: Use ComboBox
Pros: User can see the required fields for each command in the drop-down box.
Cons: As user selects an option, the command is executed with the place holders, resulting in an invalid command. User has to manually select the placeholders and change accordingly.
Auto-completion binding
Alternative 1 (current choice): Only suggest commands that starts with user input
Pros: Suggested commands are accurate.
Cons: The list usually only display one or two options because not many commands start with the same alphabet.
Alternative 2: Suggest commands that contain the user input.
Pros: More suggestions would be displayed.
Pros: User has a higher chance of finding the desired command when a typo is made.
Cons: Most of the time, inaccurate suggestions are not necessary.
Enhancement Added: Auto-completion
External behavior
For commands that require additional field(s), auto-completion can be triggered by pressing Tab after keying in the command word.
|
Commands with auto-completion enabled: |
Example:
-
Type
addin the command box -
Press Tab
-
You will see the full format displayed in the command box as shown below.

-
Note that the placeholder for the name field has been auto-selected. Now you can directly type in the name.

-
After you are done typing the name, press Tab again to go to the next field.

-
After you are done with the entire command, press Enter to execute the command as usual.
|
In addition to using Tab to navigate to the next field, you can press Shift+Tab to navigate to the previous field. |
Justification
It will be difficult for the user to remember all the fields and the corresponding prefixes. Auto-completion ensures that the user will know exactly what is required. Auto-selection of the placeholder improves the user experience, because the user can directly type in information without having to manually place the cursor.
Implementation
Auto-completion mechanism is implemented in CommandBox class under UI component.
Auto-completion is activated when Tab key is pressed. This is done by adding a case in the keypress handler in CommandBox.
@FXML
private void handleKeyPress(KeyEvent keyEvent) {
switch (keyEvent.getCode()) {
case TAB:
if (keyEvent.isShiftDown()) {
selectPreviousField();
} else {
autocomplete();
}
break;
//other cases
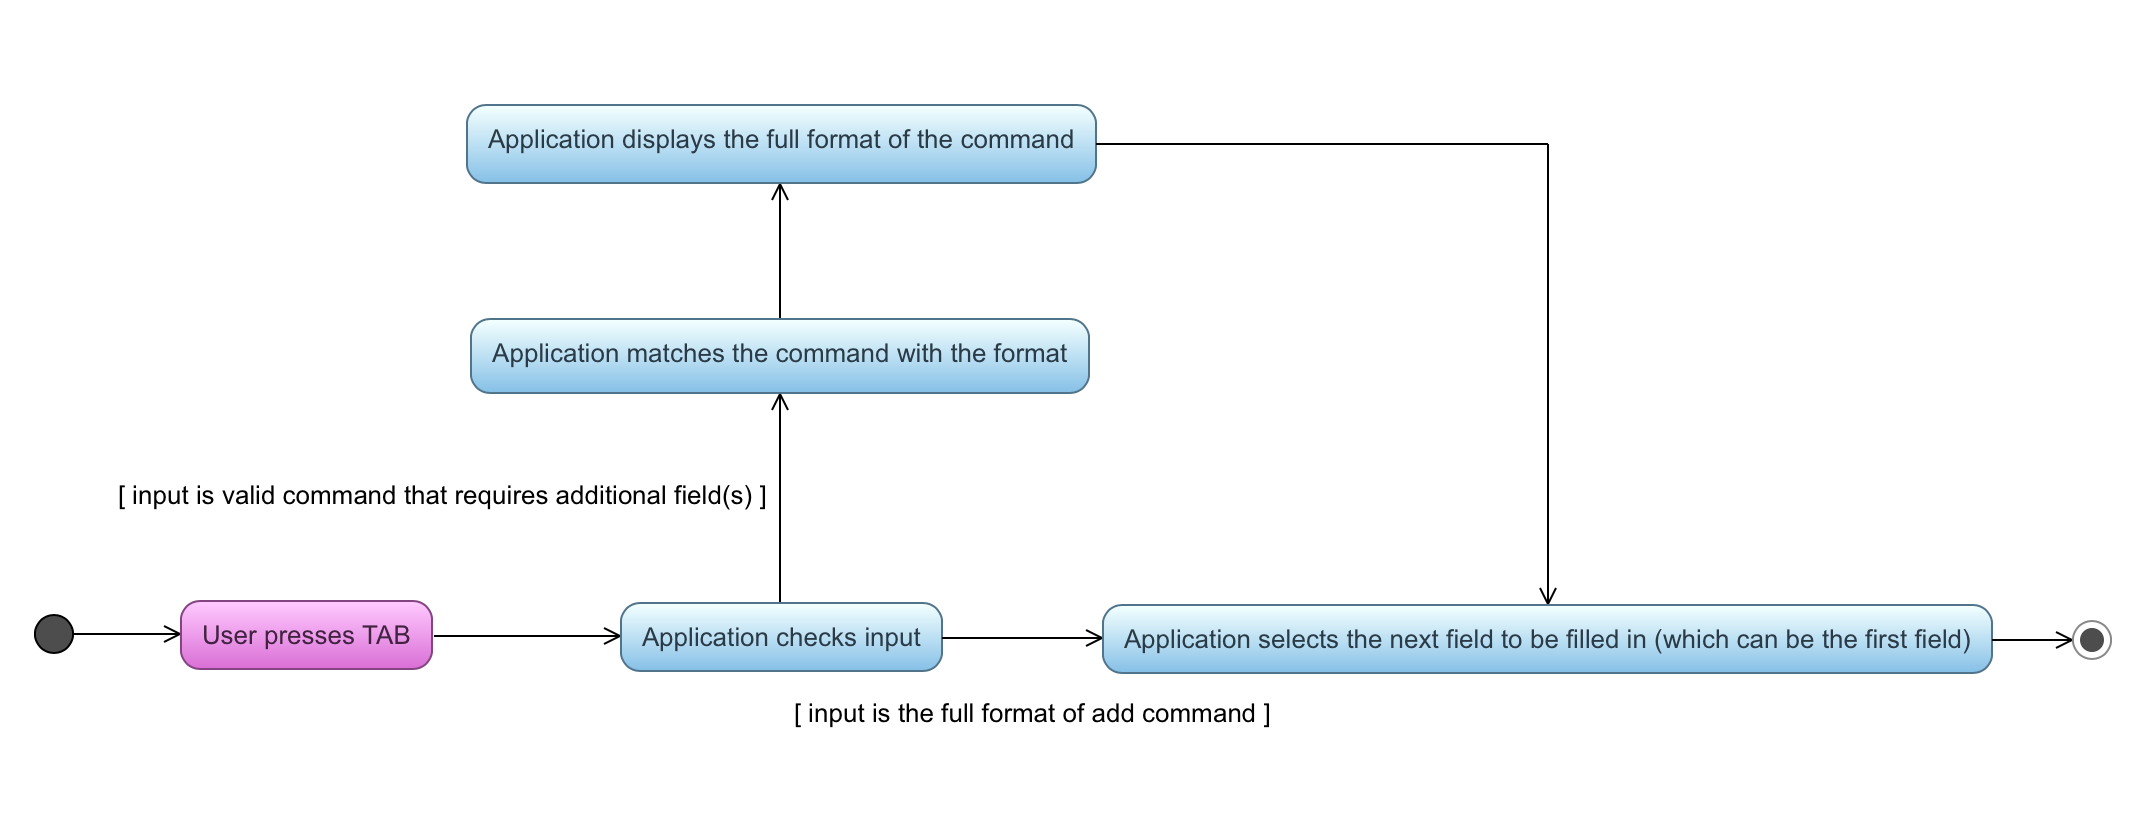
}When Tab is pressed, the current input in the command box is checked against the list of commands.
-
If the input command is a valid command that requires additional field(s), the full format of the command is displayed in the command box. At the same time, the placeholder for the first field that the user needs to key in is selected (as shown below).
-
If the input is already in the required format of
addorremarkcommand, the Tab is meant to navigate to the next input field (onlyaddandremarkrequire more than one field). The caret position is used to determine the current field the user is at. The anchor and caret positions are reset to the start and end of the next field so that the placeholder is selected (as shown below).
The above implementation is represented in this code snippet:
private void autocomplete() {
    input = commandTextField.getText().trim().toLowerCase();
    if (isAutoCompleteCommand(input)) {
        //display the full command format

    } else if (isAddCommandFormat(input)) {
        //change text selection to the next field

    } else if (isRemarkCommandFormat(input)) {
        //change text selection to the next field
    }
}
When Shift+Tab is pressed, the user wants to navigate to the previous field. The caret position is used to determine the current field the user is at. The anchor and caret positions are reset to the start and end of the previous field input in order to update text selection.
Below is an activity diagram for Tab keypress which activates auto-completion.
Design Considerations
Text Input Control
Alternative 1 (current choice): Continue to use the original TextField
Pros: External library enables bindAutocompletion for TextField (the drop down list of suggested commands that appears and updates itself as user types).
Pros: Minimise changes need to be made to the original text input control structure.
Cons: Text formatting is limited. All text in the TextField must have the same format.
Alternative 2: Create additional TextField as user request for additional fields
Pros: Allows for different formatting for different fields (Commands can have a different colour from the fields)
Cons: Original structure will be disrupted. Command box will no longer be single line text input, which have consequences such as the user cannot backspace or select through the entire line.
Enhancement Added: Opening Email Composer
External behavior
Opens the 'compose new email' window of the default email client, with the recipient’s email address and subject
(optional) filled in.
Format: email INDEX [s/SUBJECT]
|
Press Tab after typing |
Alternatives: email can be replaced by mail, mailto, send or m
Keyboard shortcut: Ctrl+M
Justification
This feature makes emailing a contact much easier. The user no longer has to go through the tedious process of copying the contact’s email address, opening the email application or website and pasting the email address there. All these can be done with a short and simple command within two seconds.
Implementation
This functionality is implemented through the EmailCommand class under logic component.
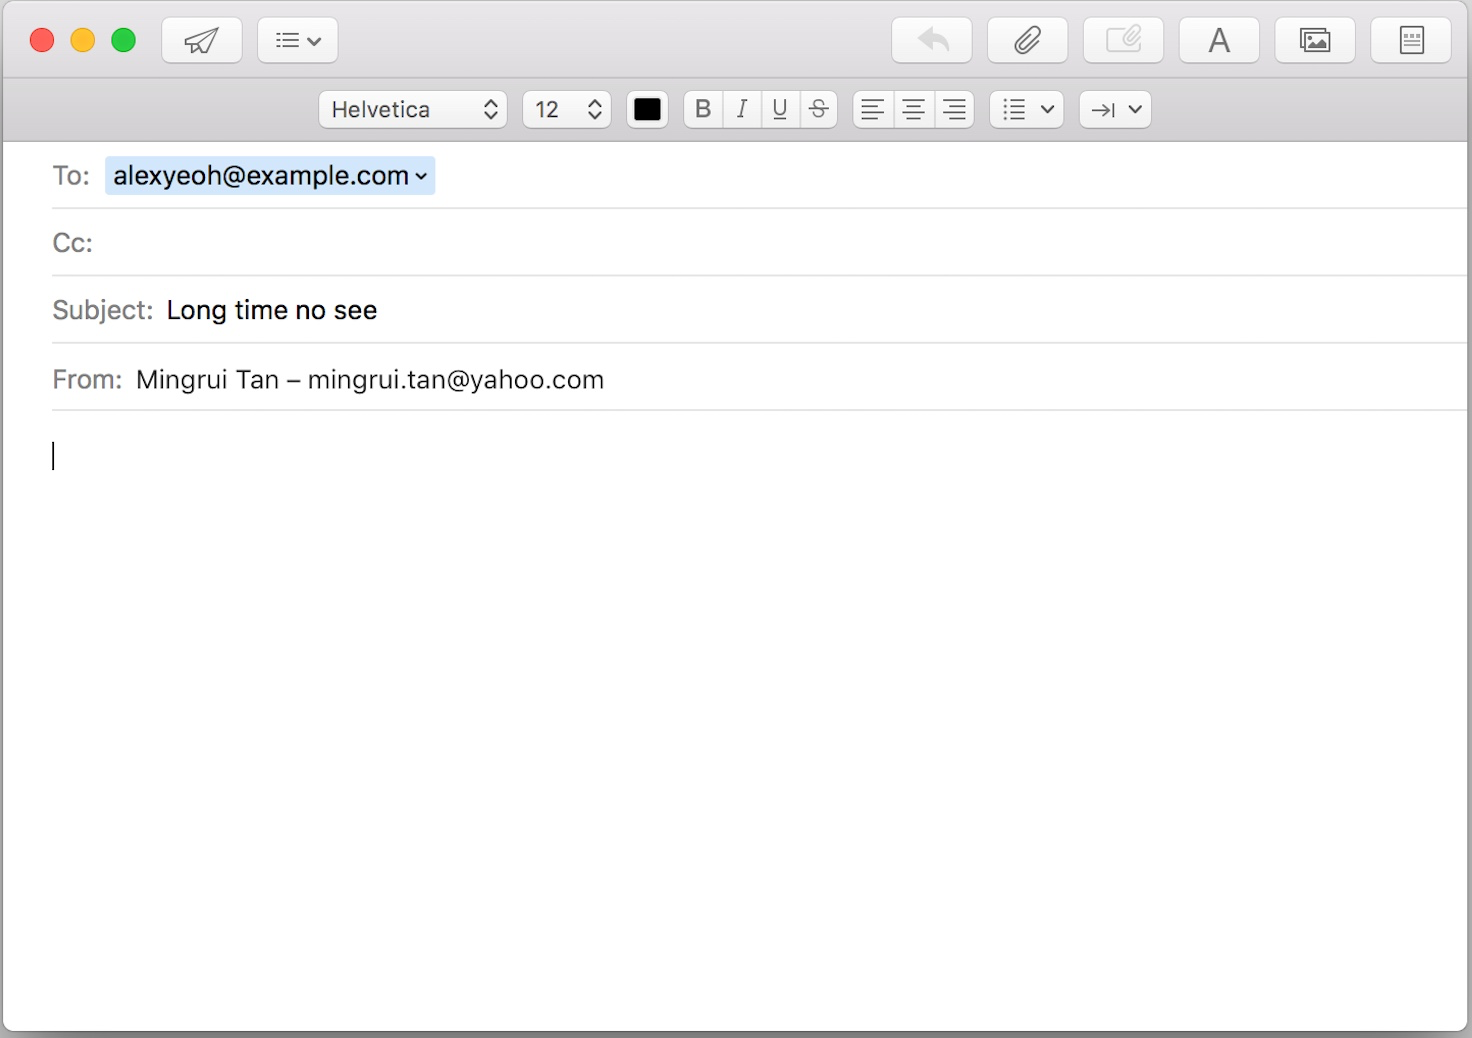
An email command has the following format: Email INDEX [s/SUBJECT] (Subject is an optional field). When the command is executed, the user’s default email client will open
a new compose window. Email address of the contact indicated by INDEX will be filled in as the recipient’s address. SUBJECT (if available) will be filled
in as the subject of the email. The following shows an example of the compose window on Macs.
Using java.awt.Desktop API
Requesting the default email client to open a new compose window is achieved with the java.awt.Desktop class. However, not all platforms support the Desktop API.
Therefore, it is crucial to check whether the API and the MAIL action are supported. A CommandExecption will be thrown if they are not supported.
After confirming that the action can be supported on the platform, an URI (Uniform Resource Identifier) is constructed using the recipient’s email address and subject input by the user (if any).
It is then passed into the mail method of Desktop class. The following code snippet shows the exact implementation.
if (Desktop.isDesktopSupported()
    && Desktop.getDesktop().isSupported(Desktop.Action.MAIL)) {

    Desktop desktop = Desktop.getDesktop();
    try {
        mailtoUri = new URI("mailto:" + recipientEmailAddress
                            + "?subject=" + subject);
        desktop.mail(mailtoUri);
        selectRecipient(targetIndex);
    } catch (URISyntaxException e) {
        e.printStackTrace();
    } catch (IOException e) {
        e.printStackTrace();
    }
    return new CommandResult(String.format(MESSAGE_SUCCESS));
} else {
    throw new CommandException(String.format(MESSAGE_NOT_SUPPORTED));
}
Auto-selecting the Recipient
After the Email command is executed, the recipient will be auto-selected in the contact list,
so that the person’s details can be displayed at contact detail panel. As an example the following screenshot shows
the behaviour of Rolodex after executing the command Email 1. The contact at index 1 is selected.
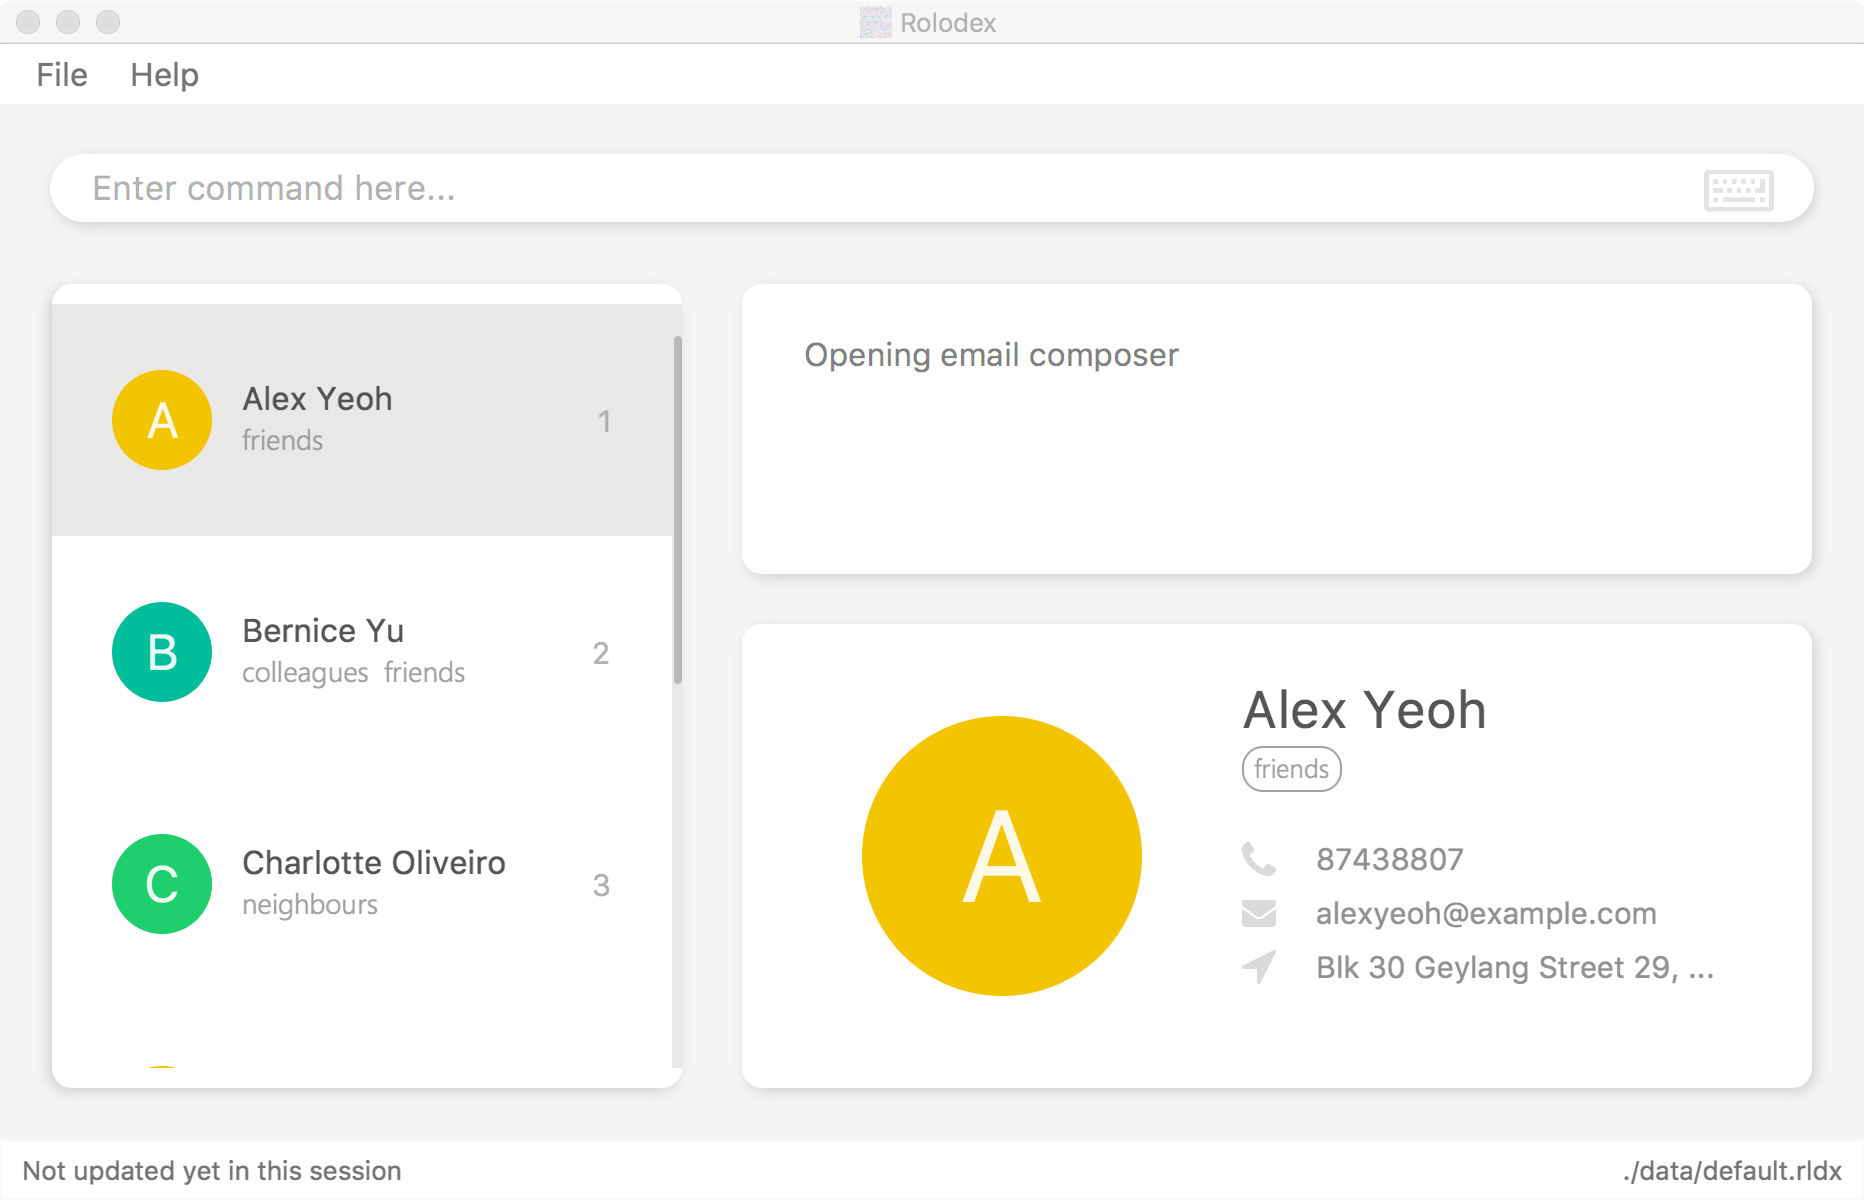
This is for the user to confirm that they have typed in the correct index. With the person’s name and contact details displayed, it is easy to double-check if the contact is the intended recipient.
This action is performed through the selectRecipient(targetIndex) method call during the execution of EmailCommand, which can be found in the
code snippet above. The selectRecipient method posts a JumpToListRequestEvent with the recipient’s index, which will perform the selection in Contact List.
The method is shown below.
private void selectRecipient(Index index) {
    EventsCenter.getInstance().post(new JumpToListRequestEvent(index));
}
Email Command Parser
EmailCommandParser class is used to parse input arguments in the context of the EmailCommand. It maps the positive integer in the argument to INDEX,
and the string following the prefix s/ to SUBJECT. If the user did not input a subject, the subject would be an empty string.
The SUBJECT string must be percent-encoded, which means all the spaces must be replaced with %20. This is to follow the URI syntax standard.
Otherwise a java.net.URISyntaxException would be thrown when sending the URI. Above mentioned implementation is shown in the code snippet below.
String subject = ParserUtil.parseSubject(argMultimap.getValue(PREFIX_SUBJECT)).orElse("");
subject = subject.replaceAll(" ", "%20");
Index index = ParserUtil.parseIndex(argMultimap.getPreamble());
Enhancement Added: Keyboard Shortcuts for Commands with Auto-complete Function
External behavior
The table below shows all auto-complete command shortcuts.
|
Using the keyboard shortcut is equivalent to typing in the corresponding command followed by pressing Tab |
| Shortcut | Purpose |
|---|---|
Ctrl++ |
Display the |
Ctrl+D or Ctrl+- |
Display the |
Ctrl+E |
Display the |
Ctrl+F |
Display the |
Ctrl+M |
Display the |
Ctrl+N |
Display the |
Ctrl+O |
Display the |
Ctrl+R |
Display the |
Ctrl+S |
Display the |
Justification
The above shortcuts provide a faster way of using the command-line interface. Users can simply activate auto-completion with a key press without the need to type in the command word and press Tab to activate auto-completion.
Implementation
The Keyboard Shortcut Mechanism is the foundation of this implementation.
When an auto-complete command shortcut is pressed, the corresponding command format will be displayed.
The following codes shows the example for add command shortcut.
private void executeKeyEvents(KeyEvent keyEvent) {
    if (KEY_COMBINATION_ADD.match(keyEvent)) {
        displayCommandFormat(AddCommand.FORMAT);
    }
    // … more cases
}
The displayCommandFormat method simulates entering the command word followed by pressing Tab.
The method implementation is shown below.
private void displayCommandFormat(String command) {
    commandBox.replaceText(command);
    commandBox.pressTab();
}
Enhancement Proposed: Integration of Social Media
Link Rolodex with the user’s Facebook account and automatically match contacts in Rolodex to the user’s Facebook friends, so that the user can view their friends' social media updates in Rolodex.
Enhancement Proposed: Prompt the User for Confirmation before Execution of Dangerous Commands
Before executing commands clear and exit, ask the user "Are you sure you want to…?". Continue with the execution if the user responds "yes", stop the execution otherwise.
These two commands are considered dangerous because the entire contact list can be cleared or the current Rolodex can be closed. The confirmation can make sure that they are not executed by accident.
An implementation of confirmation dialog box can be found here. It is not used in the current version of Rolodex due to project requirement. Command line confirmation (the user types "yes" in the command box) is a more recommended implementation that integrates well with the command-lind interface.